Finding the right fertilizer for your aquarium plants is a challenge.
Commercial fertilizers are expensive and may not contain the nutrients your aquatic plants need.
Dosage instructions on many commercial fertilizers are confusing. High amounts of fertilizer can lead to excessive algae blooms, and too little can prevent healthy plant growth.
Adding to the confusion is the choice of different fertilizer methods.
Clay fertilizer balls and root tabs work well for rooted plants but not for floating plants.
Liquid fertilizers work for all types of aquarium plants. But, they may not contain the right concentration of nutrients.
Making your own natural plant fertilizer solves many of these common issues. Using a homemade fertilizer gives your more control over the ingredients and dosage.
This handy guide teaches you how to fertilize aquarium plants naturally with a few simple ingredients.
Table of Contents
Why Use a Natural Fertilizer for Aquarium Plants?
Creating a natural fertilizer for your aquarium plants ensures the ingredients are safe for your fish.
Some commercial fertilizers contain copper. When used in large doses, copper can kill snails, shrimp, and scaleless fish species.
Natural fertilizers are also less expensive and more effective than their commercial counterparts.
Different Types of Natural Fertilization Methods
There are several natural fertilization methods. Each one has its advantages and disadvantages.
Some fish tank owners rely on fish droppings and leftover fish food for natural fertilization. This method is only effective when using an active substrate like aquarium soil.
While high-quality fish foods have trace minerals, they are not enough to sustain healthy plant growth on their own.
Aquarium soil substrates are a popular way of providing added nutrients for aquatic plants. But this substrate loses nutrients over time, and you must replace it.
Another method of natural fertilization is creating fertilizer balls. This method combines calcium clay powder and powdered seaweed into balls you place in the substrate.
Fertilizer balls contain low levels of nutrients and are only effective for root-feeding plants.
This guide focuses on creating a natural liquid fertilizer. Natural liquid fertilizers contain essential plant nutrients without using any harmful chemicals.
Liquid fertilizers provide effective results for root-feeding plants and floating plants.
Precautions for Natural Liquid Aquarium Plant Fertilizers
Natural liquid aquarium plant fertilizers are safer than commercial varieties. But you must still take precautions when using them.
Too much fertilizer can disturb your water parameters and cause green and brown algae growth. This creates an unhealthy environment for your fish as well as your plants.
Not using enough fertilizer results in nutrient deficiency symptoms in your plants.
The amount and frequency of fertilization depends on your lighting and how many plants you have.
7 Steps for Using Natural Fertilizers With Aquarium Plants

1. Gather Your Supplies
The first step in creating your natural liquid fertilizer is gathering your supplies.
Having everything you need before you start makes the process easier.
This fertilizer recipe uses dry ingredients and distilled water.
These ingredients are available at most garden centers as well as online stores.
Supplies:
- Empty 1-liter bottle
- Distilled water
- Accurate kitchen scale
- Calcium nitrate
- Potassium sulfate
- Monopotassium phosphate
- Magnesium sulfate (Epsom salt)
- Trace minerals (as needed)
- Trace mineral tester
- Aquarium water test kit
- Aquarium vacuum
- Large bucket
- Thermometer
- Water conditioner
You must ensure your kitchen scale is entirely accurate so you get the correct measurements of each nutrient.
I like this kitchen scale because it has an accuracy of 0.01 ounces and is reasonably priced.
The correct ingredient measurements are important and tailored to your lighting and plant needs.
Only use pure Epsom salt for this fertilizer. Some Epsom salts contain dyes or fragrances which are harmful to your plants and fish.
2. Fill An Empty 1-Liter Bottle with Distilled Water
Distilled water is the best choice for this homemade natural fertilizer.
The distillation process heats the water until it condenses.
This process ensures the water does not contain the following:
- Contaminants
- Impurities
- Dissolved solids
- Ions
- Minerals
- Metals
- Salts
Spring water and tap water contain trace elements of minerals and nutrients. Tap water also includes chlorine and chloramine, which is dangerous for your fish.
By using distilled water, you don’t have to guess at how many minerals and nutrients it contains. You’ll know the exact amount of nutrients when you add the ingredients to the water.
When filling your empty bottle with distilled water, leave some room for the rest of the ingredients.
Consider rinsing your empty bottle with distilled water before filling it. This ensures the bottle does not contain any contaminants from your tap water.
3. Add the Ingredients to the Bottle
This natural fertilizer recipe uses various ingredients for a well-rounded nutrient profile.
Aquatic plants need the following essential nutrients for healthy growth and root development:
- Nitrogen
- Potassium
- Phosphorus
- Calcium
- Magnesium
- Iron
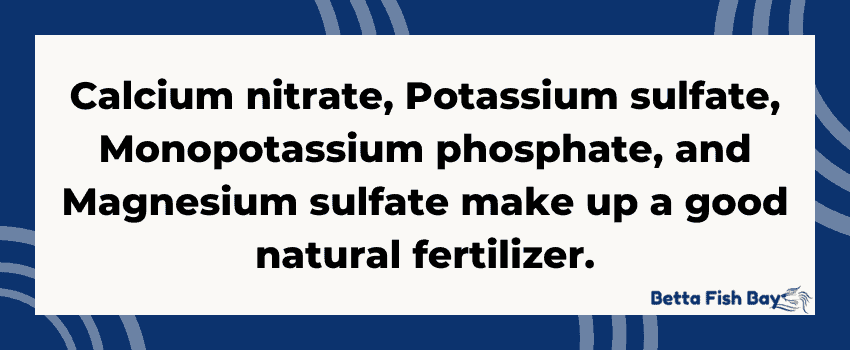
This recipe includes:
- Calcium nitrate
- Potassium sulfate
- Monopotassium phosphate
- Magnesium sulfate
These ingredients include all the nutrient requirements except for iron. Iron comes later when you dose the tank with trace minerals.
Weighing the fertilizer ingredients on a kitchen scale gives you the best results. But you may use plastic measuring spoons as long as they are accurate.
Do not use metal measuring spoons. Some of the ingredients react with the metal and cause rust.
Measure out your ingredients in the following amounts:
- 15 grams (0.53 ounces) of calcium nitrate
- 22 grams (0.78 ounces) of potassium sulfate
- 1.42 grams (0.05 ounces) of monopotassium phosphate
- 8 grams (0.28 ounces) of magnesium sulfate
Add the ingredients to the bottle of distilled water and shake it up. This ensures the fertilizer ingredients dissolve in the water.
4. Calculate the Correct Fertilizer Dose for Your Aquarium
The amount of fertilizer you add depends on the lighting level and the number of plants in your aquarium.
A heavily planted tank needs more nutrients than one with very few plants.
High lighting levels need an increase in fertilizer.
Maintenance in a tank with bright lights is difficult because of algae growth. Medium to low lighting allows for more control over algae growth.
The following table shows the correct dosage levels of natural fertilizer for different lighting and plant densities.
| Plant Density | High Lighting | Medium Lighting | Low Lighting |
|---|---|---|---|
| Low | 5mL per 10 gallons | 2.5mL per 10 gallons | 1.25mL per 10 gallons |
| Moderate | 10mL per 10 gallons | 5mL per 10 gallons | 2.5mL per 10 gallons |
| Heavy | 15mL per 10 gallons | 10mL per 10 gallons | 5mL per 10 gallons |
A 5mL dose in a 10-gallon tank would add:
- 1.04 ppm (parts per million) of nitrate
- 0.13 ppm of phosphate
- 1.35 ppm of potassium
- 0.34 ppm of calcium
- 0.1 ppm of magnesium
These small amounts provide enough nutrients for plants without encouraging excessive algae growth. The nutrients are also safe for fish and will not disturb your water chemistry.
How Often Should You Add Fertilizer to Your Aquarium Plants?
It is best to start with a cycled tank before adding fertilizer, but you don’t always have to. The main issue with fertilizing an uncycled tank is ammonia, which encourages algae blooms.
Excess algae interfere with the nutrient intake of your plants by stealing the extra nutrients.
Algae eaters like otocinclus catfish and mystery snails help control algae outbreaks.
I recommend testing your water for nutrients so you know which ones your aquatic plants lack. Test your water parameters as well.
Start by adding the correct dose of natural fertilizer to your tank for six days a week.
The best time for adding fertilizer is in the morning. This lets your aquatic plants absorb the nutrients throughout the day.
Light triggers photosynthesis in plants to process nutrients and produce oxygen. At night, the plants are dormant, releasing carbon dioxide instead of oxygen.
Perform a partial water change on the seventh day, and do not add fertilizer.
Watch your plants for changes in growth. Yellowing or wilting leaves are a sign of too much fertilizer.
Reduce how often you fertilize and make notes of any improvements.
5. Add Trace Minerals to the Tank (If Needed)
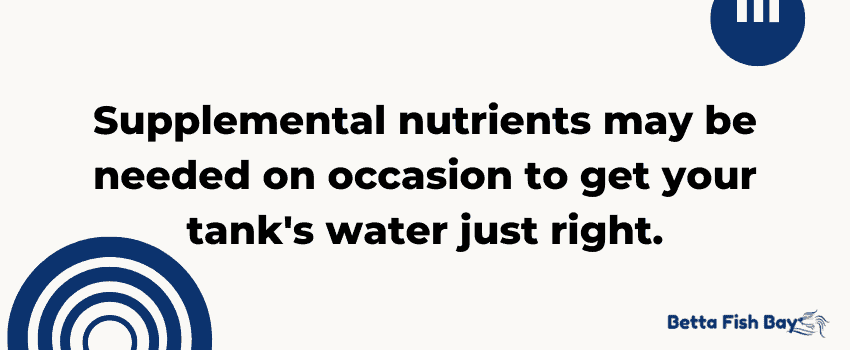
The next step is testing your aquarium water for trace elements.
Most aquariums do not need extra minerals because they already exist in the water column.
Aquarium gravel substrates, fish waste, and decaying organic materials all contain trace minerals.
High-quality fish food is also an excellent source of trace minerals, including:
- Boron
- Copper
- Manganese
- Molybdenum
- Nickel
- Zinc
- Iron
If your tank lacks these essential trace elements, you must add them to your tank.
This micronutrient supplement contains all the trace minerals your plants need. Follow the instructions on the bag for the correct dosage levels.
Continue adding this supplement as needed.
6. Perform a Weekly Partial Water Change
Every week, you must perform a partial water change. Aim to remove and replace 20 to 25% of your tank water.
Water changes help keep the water clean by removing bacteria and toxins like ammonia and nitrite.
Adding fresh water also maintains pH levels and replenishes minerals from tap water.
Removing too much water at one time disrupts your nitrogen cycle.
Steps for Completing a Proper Water Change
Before you begin your partial water change, gather your supplies:
- Large bucket
- Aquarium siphon/gravel vacuum
- Thermometer
- Water Conditioner
Check the temperature of your tank water and make a note.
You want the new water as close to the same temperature as your tank. This reduces the risk of temperature shock in your fish.
Turn your filter, heater, and lights off and unplug them. This extra safety precaution protects you from an electrical shock.
It also prevents damage to your filter and heater from lower water levels.
Siphon 20 to 25% of your tank water into your large bucket.
Use a gravel vacuum to clean debris from the substrate. Scrape away accumulated algae from the sides of your tank with an algae scraper.
Rinse dirty filter media in the bucket of tank water and place it back into your aquarium filter.
Instead of throwing out the old tank water, use it for watering household plants. This water looks dirty, but it contains essential nutrients your houseplants can use as a fertilizer.
Fill the empty bucket with the correct amount of hot and cold tank water. Aim to get the water to the same temperature as your aquarium water.
Add a water conditioner to the bucket of new water and let it sit for a few minutes. The water conditioner removes chlorine and chloramine, which are toxic to fish.
Pour the new water back into the tank. Pouring the water over a small plate prevents disturbing the substrate too much.
After filling the tank, turn your filter, heater, and lights back on. Check your tank temperatures again, and ensure they are at a safe level for your fish.
Repeat the water change process every week on the same day.
7. Test Your Water Parameters Every Week
Test your water parameters and nutrient levels every week.
This ensures you have optimal water conditions for your aquatic plants and fish.
A nutrient test lets you know which nutrients your aquarium water needs and prevents you from adding too much fertilizer.
Most water parameter tests can show you levels of:
- pH
- Ammonia
- Nitrite
- Nitrate
I recommend test tube kits over test strips. Test tube kits are more accurate and easy to read compared to test strips.
Ammonia or nitrite levels above 0 ppm (parts per million) can poison or kill your fish and plants.
Nitrate levels less than 40 ppm are safe. Aquatic plants consume nitrates during photosynthesis and release oxygen.
This process helps maintain a more balanced environment in your tank.
Tips for Fertilizing Your Aquarium Plants
Never Skip Weekly Water Changes
No matter what type of fertilizer you use, you must do partial water changes every week.
Partial water changes are vital to the health of your plants and fish.
Water changes also reduce algae buildup by removing the excess nutrients it feeds on.
Add Plenty of Plants
When you use aquarium fertilizers without a lot of plants in your tank, algae growth increases.
This algae growth happens because it does not have a lot of competition for nutrients.
Adding more plants reduces algae growth. Fish also appreciate the more natural environment the plants provide.
Do Not Overstock Your Tank
Having too many fish in an aquarium increases the bio-load from fish waste.
This extra fish waste accumulates and releases excess nitrogen.
Adding fertilizer makes the problem worse and increases algae outbreaks.
Add Algae Eaters
Algae eaters help keep the tank cleaner by consuming excess algae.
Some excellent algae eaters include:
- Amano shrimp
- Otocinclus catfish
- Mystery snails
- Nerite snails
- Bristlenose plecos
Be sure your tank is large enough for these species before bringing them home. I recommend at least a 10-gallon tank, but a 20-gallon tank is better.
You must also ensure the new fish have the same water parameter needs as your current fish.
While algae eaters are amazing scavengers, you must supplement their diet with algae wafers so they don’t starve.
Going All-Natural With Aquarium Plant Fertilizers
Creating your own natural fertilizer gives you more control over the health of your aquarium plants.
Making a natural fertilizer is easy, and you know exactly what it’s made of.
Using a natural fertilizer helps you avoid the pitfalls of commercial aquarium plant fertilizers.
With weekly water changes and water testing, natural fertilizers help your aquatic plants grow strong.
Frequently Asked Questions About Fertilizing Aquarium Plants
What is the most important fertilizer for aquarium plants?
The most essential nutrients for aquatic plants are:
– Nitrogen
– Phosphorus
– Potassium
– Iron
These nutrients keep your plants green and promote strong root growth.
Plants lacking these nutrients usually have yellow or brown leaves and sparse growth along the stem.
Most of these nutrients exist in your tank in small amounts. They come from fish waste, uneaten food, and decaying organic matter.
Can I use normal plant fertilizer in an aquarium?
Never use a regular plant fertilizer in your aquarium!
Fertilizers meant for terrestrial plants contain ammonia, which is very toxic for your fish.
Some of these fertilizers also contain dangerous chemicals and can kill fish and aquatic plants.
If you use commercial fertilizers for aquarium plants, ensure they are safe for your fish.
Creating your own natural aquarium plant fertilizer removes these concerns because you know exactly what is in it.
When should I start fertilizing my aquarium plants?
Start fertilizing your aquarium plants when you add them to your tank.
This is a challenge in an uncycled tank because of algae growth. But fertilization keeps your new plants from “melting” in their new environment.
Fertilizing your aquatic plants soon after adding them promotes strong root growth.
Healthy plants benefit your aquarium by producing more oxygen and filtering out harmful bacteria.
If you wait until your tank is fully cycled, the recovery of your plants is more difficult. You may even lose some plants during this process if you do not feed them.